Set up a view
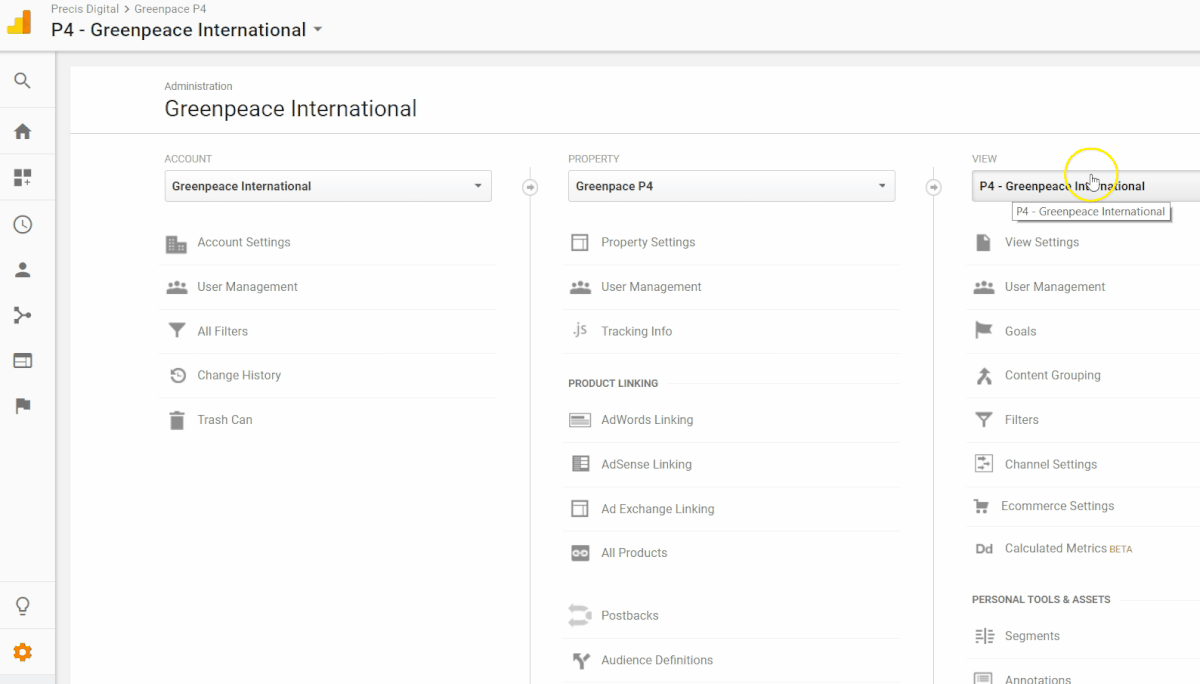
There are three admin sections in the Google Analytics accounts, each operating at different levels: ACCOUNT | PROPERTY | VIEW.
This page covers the items to be configured in the view admin for newly created views:
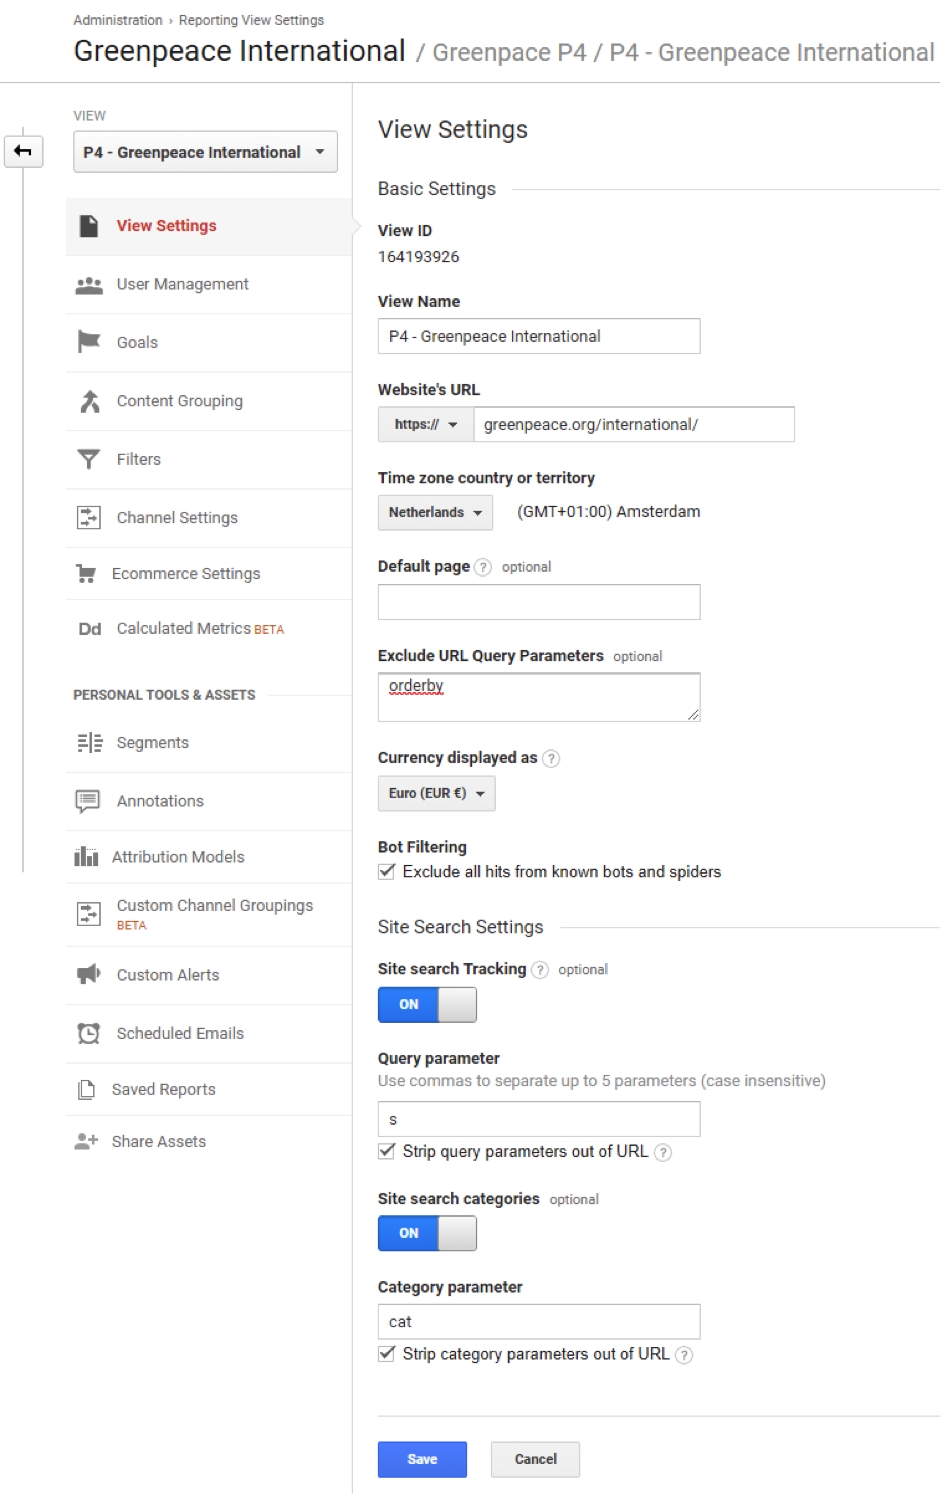
View settings
View ID:
164101728View Name:
P4 - All SitesWebsite's URL:
greenpeace.orgTimezone:
GMT+0Currency:
EuroBot Filtering:
enabled
Please use the settings shown above, with the only difference that the website’s URL should be updated to match the URL for your site and use your local timezone.
KEY INFO >>The timezone setting affects how Sessions are counted, as any active session crossing over midnight in the selected timezone will be split into two.
Exclude URL Query Parameters
orderby,fbclid,sourceid,ms,emci,emdi,fn,em,hp,locale,source,ea.tracking.id,ea.url.id,forwarded,hsa_mt,hsa_ad,hsa_net,hsa_kw,hsa_tgt,hsa_cam,hsa_acc,hsa_ver,hsa_grp,campaign_project,content_specific
Site search settings
Site Search Tracking:
Status:
onQuery Parameter:
sStrip query parameters out of URL:
enabled
Site Search Categories:
Status:
onQuery Parameter:
catStrip query parameters out of URL:
enabled
Goals
Goals measure how well your site or app fulfills your target objectives. A goal represents a completed activity, called a conversion that contributes to the success of your business. Here are some examples of goals that you can measure in Planet 4:
Petition Signup
Action Alert (aka "newsletter signup")
Social share
Scrolled depth (aka "scrolled to bottom")
File Download
Donation Buttons
Goals fall into one of 4 types, listed in the table below:
Key Info: Goals are limited to 20 per reporting view. To track more than 20 goals, create an additional view for that property, or edit an existing goal you don't need anymore.
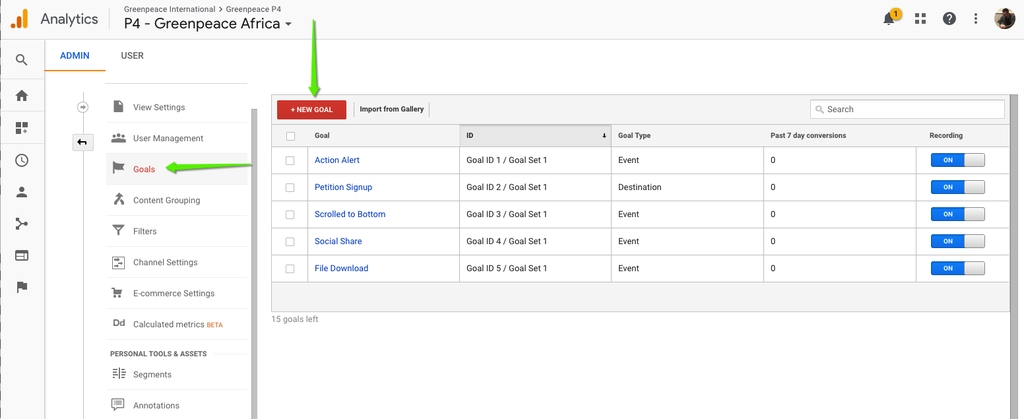
Creating your goals
Navigate to Admin > View > Goals as the picture below:
Take a look at the examples below to create your own goals:
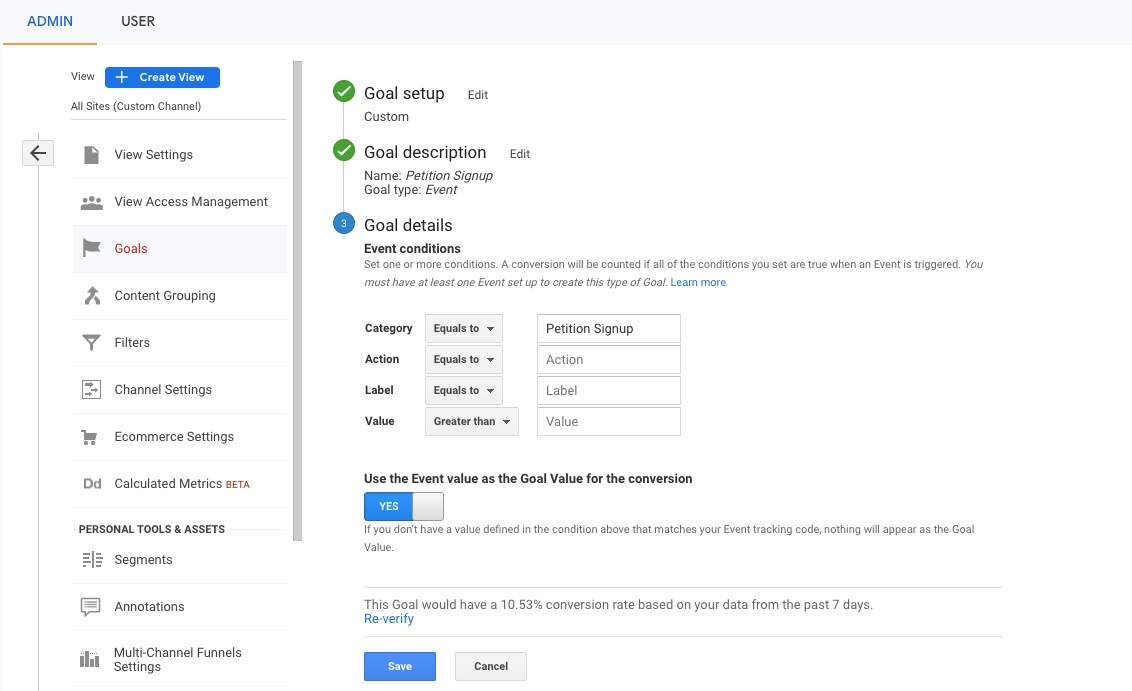
1) Petition Signup
The petition signup goal is based on a standard event that is happening on multiple platforms (eg. Planet 4 and Hubspot). The event goal should be able o capture these conversions regardless of page URL.
Create a custom goal setup with the event goal type. Add a name to your goal and the event conditions it should match. In this case, the goal conversion will capture all events with the category equals Petition Signup.
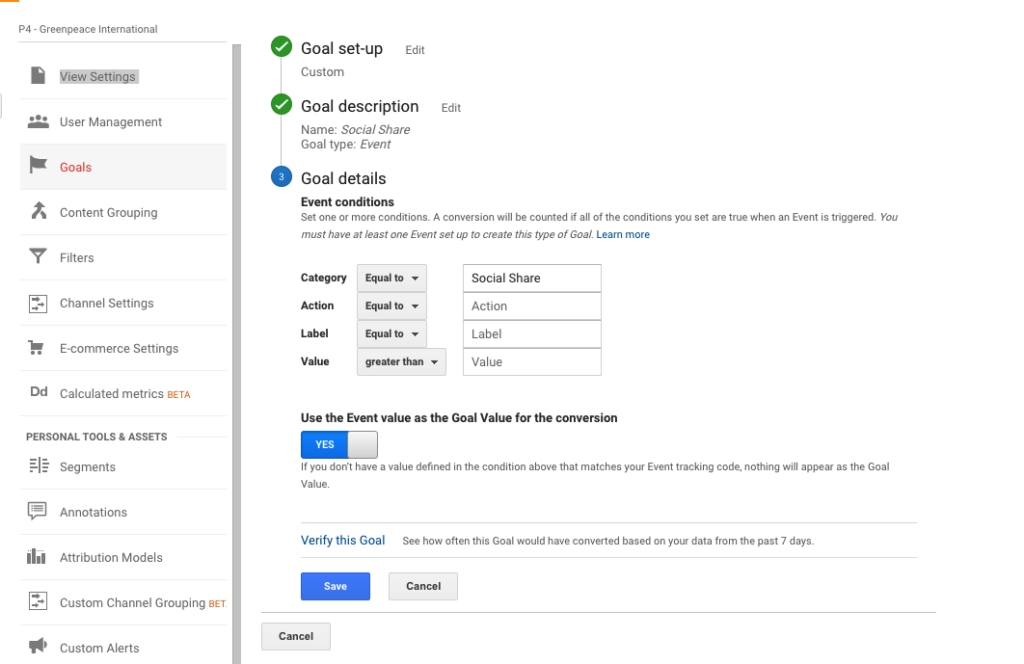
2) Social Share
Using the global standards for your tracking setup in Google Tag Manager you will be able to capture generic events from users whenever they click on the Social Sharing buttons.
To complete the setup and visualize social sharing conversion you have to create a event goal type in your Google Analytics view to match the category Social Share
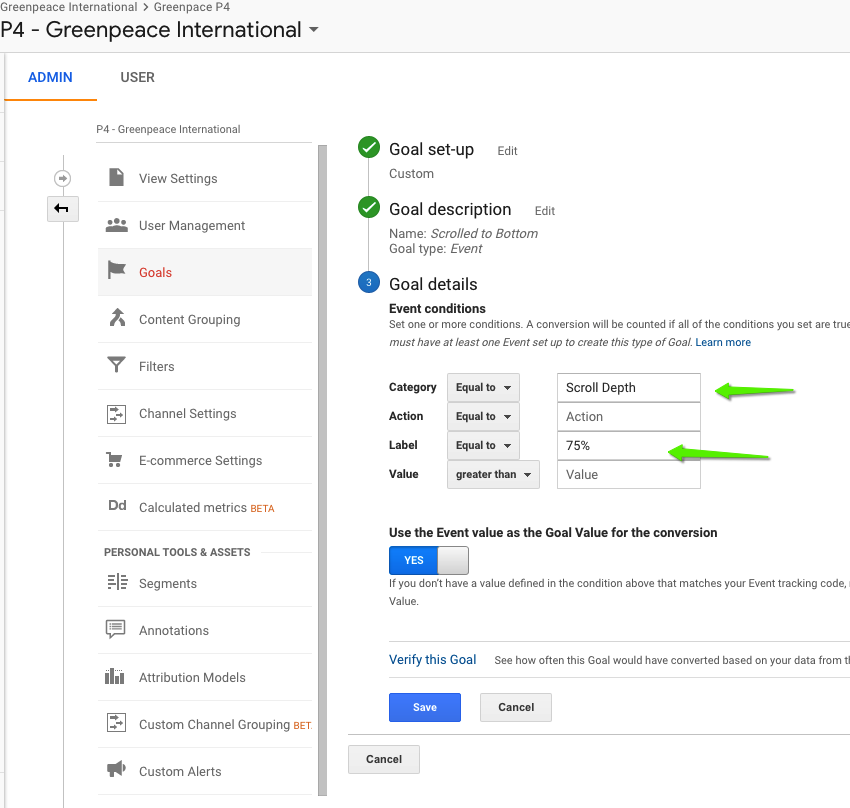
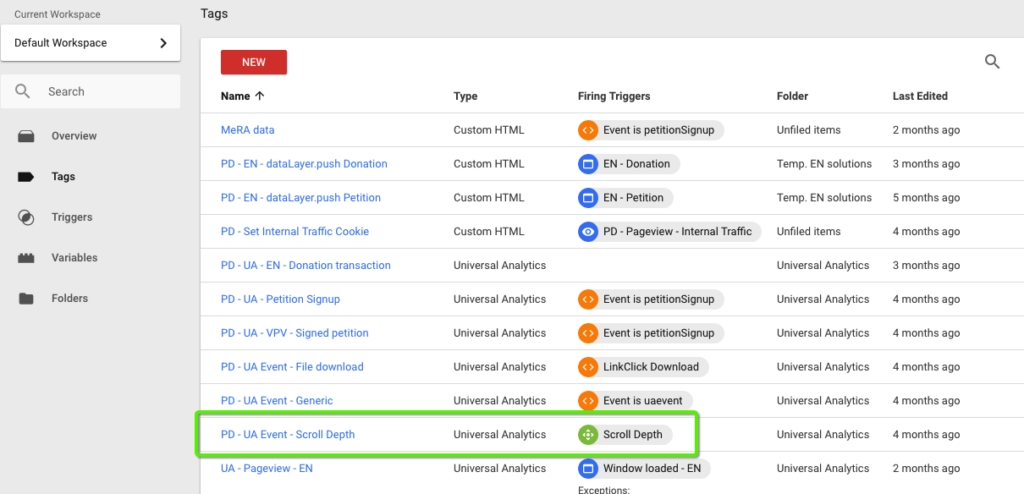
3) Scroll depth
Using the global tracking standards, there should be a "Scroll Depth" event tag set up in your GTM container. This tag will fire events to your Google Analytics view anytime people scroll down your website pages and consume content.
To complete the set-up in Google Analytics, you have to set up a custom goal and set up the event category to matchScroll Depth and the label as the minimum percentage you want to capture. For Greenpeace International, we considered 75% as our goal for scroll depth.
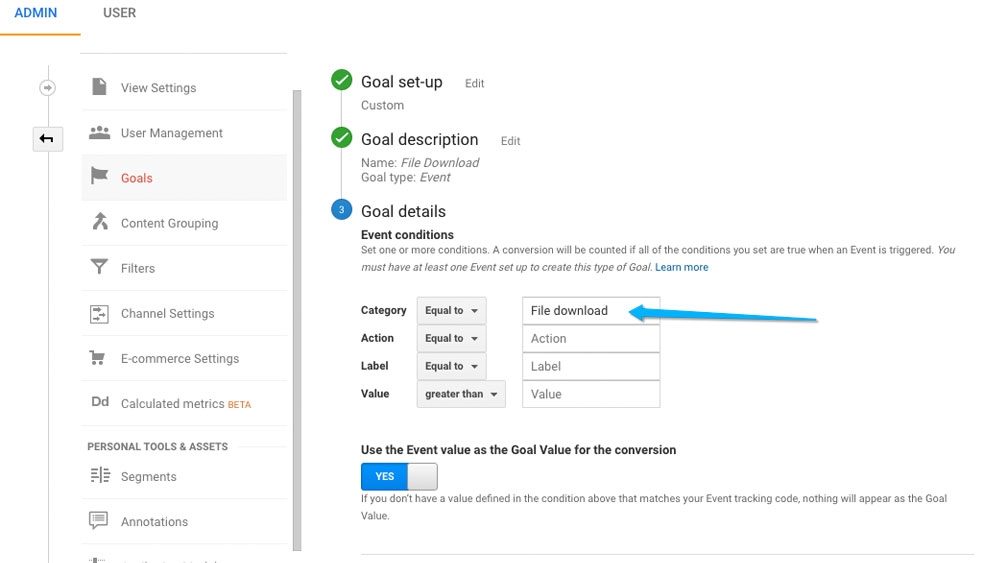
4) File Download
Similar to the events above, the File Download event is also part of the global event tracking standards. Use this to configure your conversion goal in Google Analytics. Your custom goal should match any events with the category File Download.
Duplicate goals
You can also copy goals from one view to another. You can do it for individual goals or all at once by copying the share URL into your browser like this:
Click here to download the template for setting up goals for the main global property events: Action Alert, Cookies Bar, Country List, Donate Button, Donation, Lead Generation, Petition Signup, Social Share, Take Action Boxout.
Content Grouping
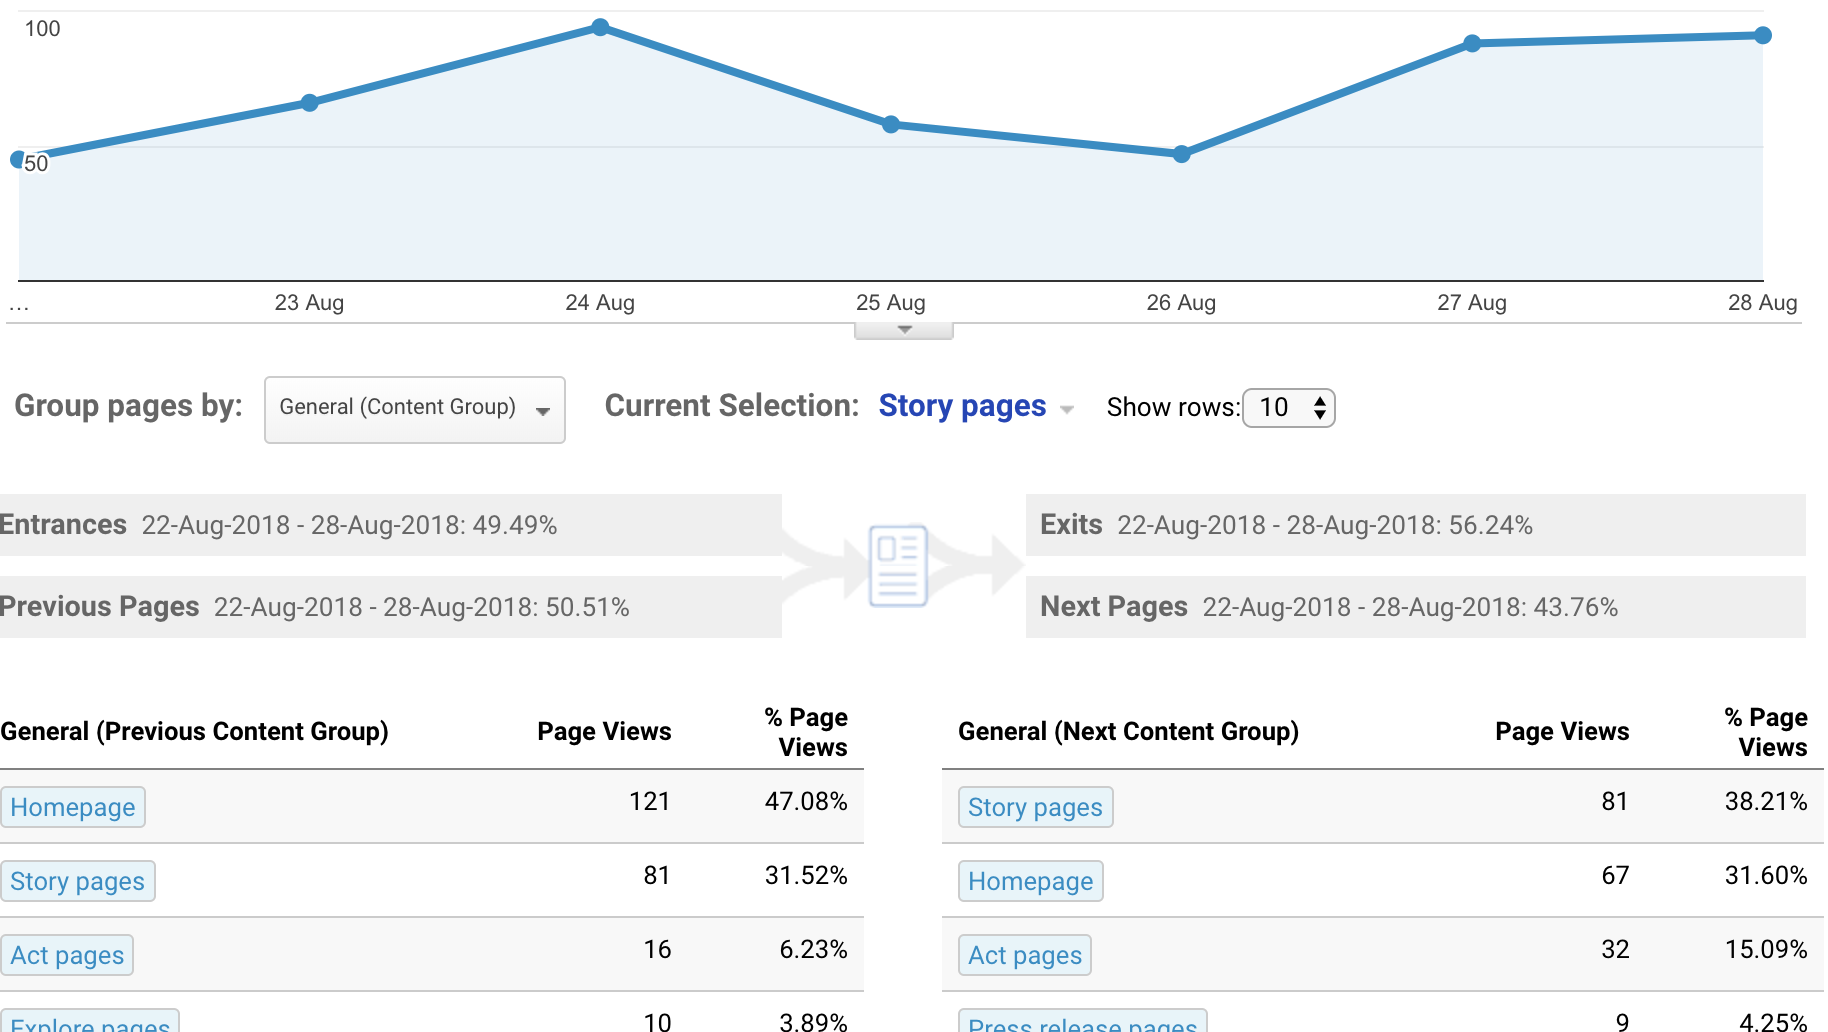
Content Grouping allows you to group content into a logical structure that reflects how you think about your site, view and compare aggregated metrics by group name before drilling down to the individual pages.
Use case: With content groupings you can analyse the aggregated number of pageviews for story or blog pages.
When setting up your Google Analytics view for your country or region, you'll need to define these groups in the way that fits your analysis needs. We have a best practice recommendation that we have implemented for the International website, but feel free to customize it in your own view.
Key Info: You can have up to 5 different content groupings in a Google Analytics View.
There are many benefits to using Content Grouping. A report such as the Navigation Summary report is a great way to understand how people navigate the site. You are welcome (and strongly recommended) to use these grouping definitions to unlock very powerful reporting!
1) Set up in Tag Manager
You can send specific values for your content grouping through Google Tag Manager's variables.
In Planet 4, we are using a dataLayer variable called pageType to send specific values directly from the system. This is usually set up through your Google Analytics Settings Variable (see more information here).
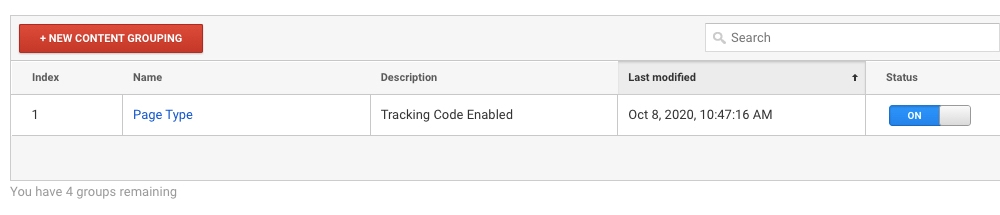
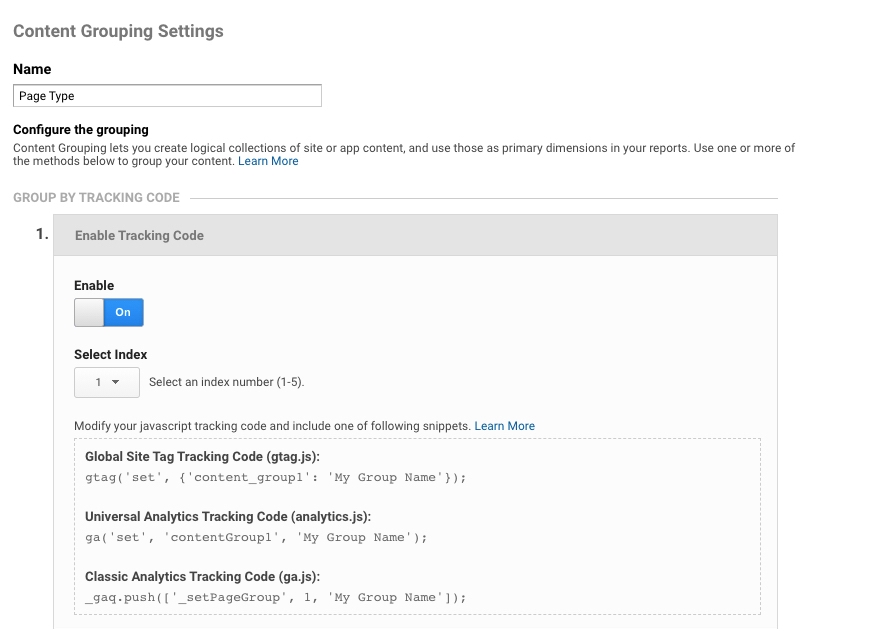
In both cases, don't forget to enable the content grouping in your Google Analytics view with the option "Tracking Code Enabled". Make sure you are using the same index in your Google Tag Manager container.
2) Set up in Google Analytics
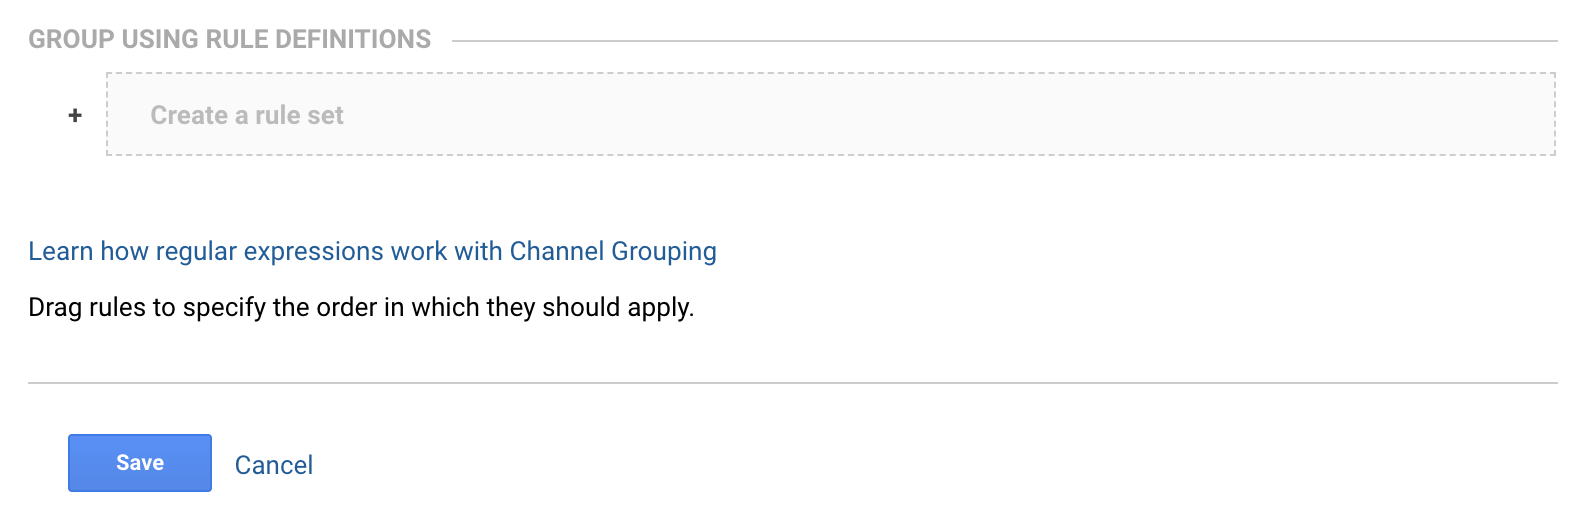
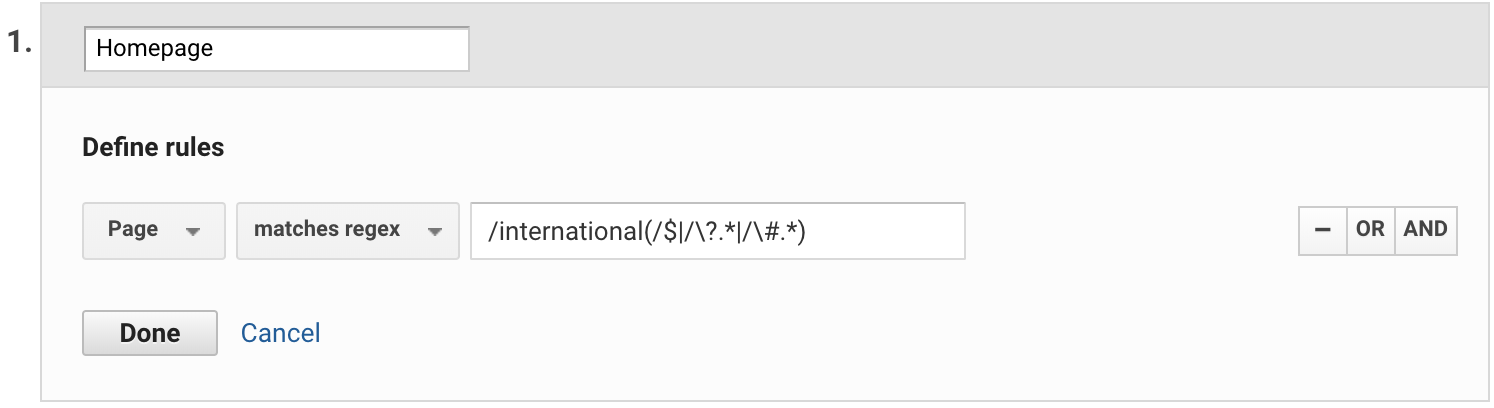
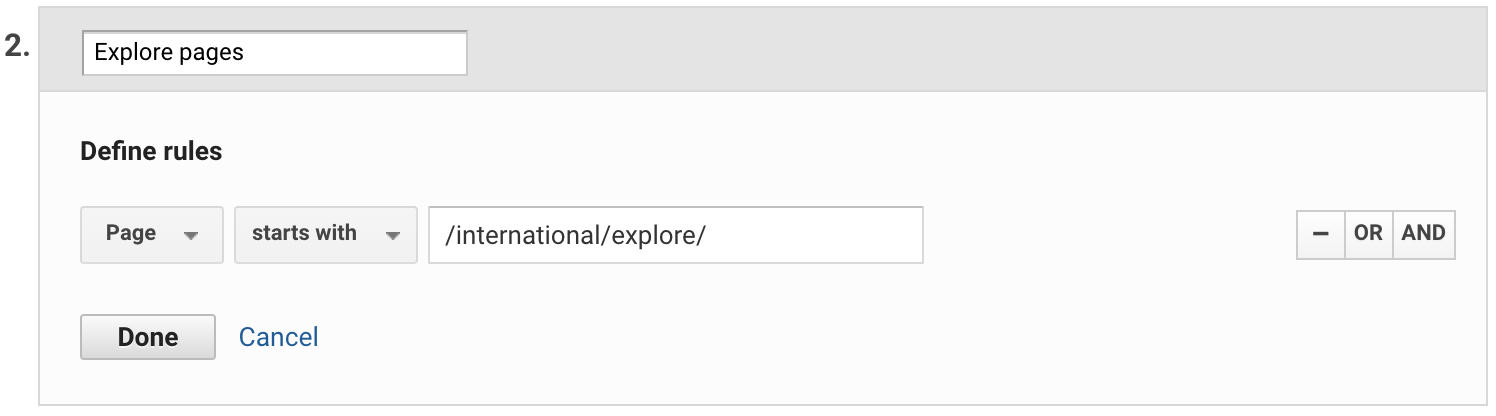
You can also set up your content grouping using rule definitions. Go to Admin > View > Content Grouping and create a new group. Give your content group a name and scroll down to the bottom option “GROUP USING RULE DEFINITIONS”:
Click “Create a rule set” for each group that you would like to create and give it a name. Take a look at the rulesets for the International site below. You can copy and adjust them accordingly to your website structure:
Once you have set the rules for each group, the data will start to collect from the point that you saved the group.
Filters
All new views must be configured with filters, to make sure only the needed data is collected in each view. Most of these filters are already available in the UA-109290164 Google Analytics Account and should be added as soon as the view is created.
Go to the View settings for the newly created view and select filters and add the recommended ones below:
Include-only filters
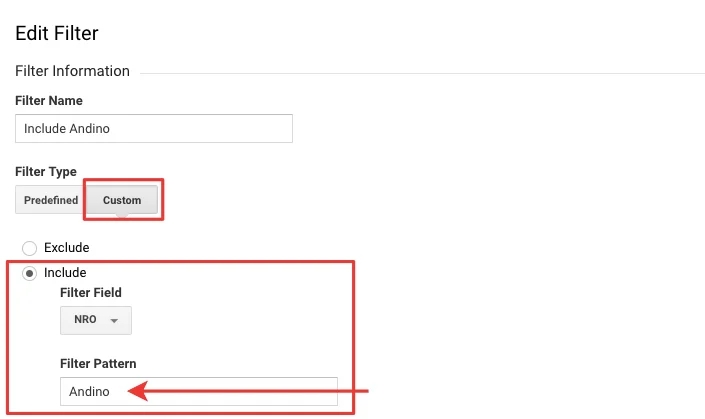
Include only specific Office/NRO data
Add a custom filter to capture only your office or NRO data. We should create a filter based on the custom dimensions values (sent through Google Tag Manager). Take a look at the example below:
Exclusion filters
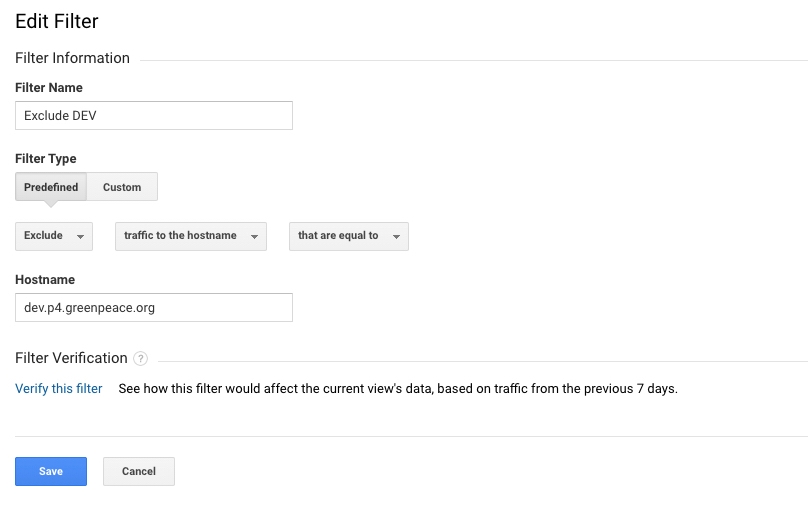
DEV Exclusion Filters
The Global Analytics account includes pre-defined filters to remove traffic data from our staging and dev sites. You can add them directly to your view since they are based on the hostname value. Here's an example of how these filters are set up:
IP Exclusion Filters
The Global Analytics account already includes several exclusion filters matching offices' IP addresses. Make sure you're adding these filters to your view to remove internal traffic
Dynamic IP Exclusion
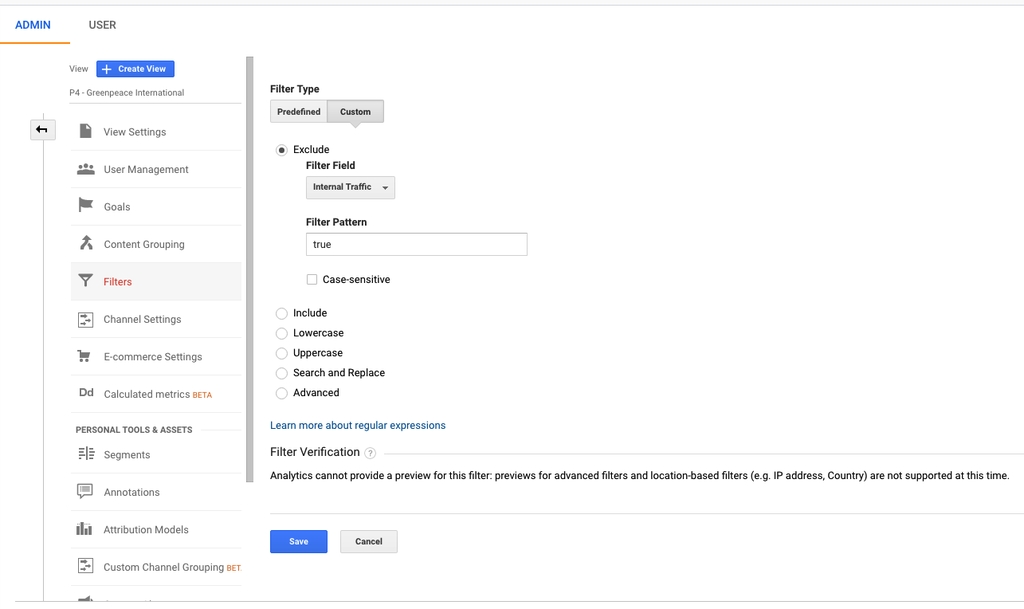
Given that we are not tracking IP addresses, it is important that all employees add one additional step to exclude internal traffic from being consolidated. This can be done by placing a custom cookie in all employees’ browsers. Please take a look at the Google Tag Manager instructions to implement this setup.
Once you checked that the cookie is correctly set up, you should create a filter in Google Analytics to remove the hits from the users that contain it. This filter is based on the custom dimension Internal Traffic:
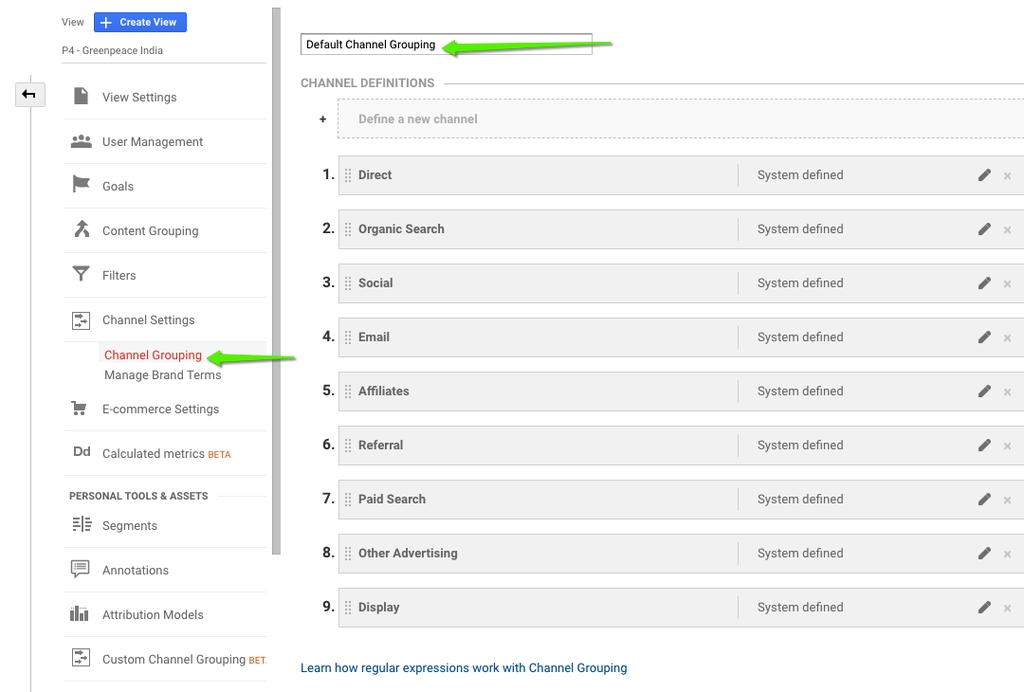
Channel Settings
Channel Groupings are rule-based groupings of your traffic sources. Throughout analytics reports, you can see your data organized according to the Default Channel Groupings, which allows you to check the aggregated data of each channel easily.
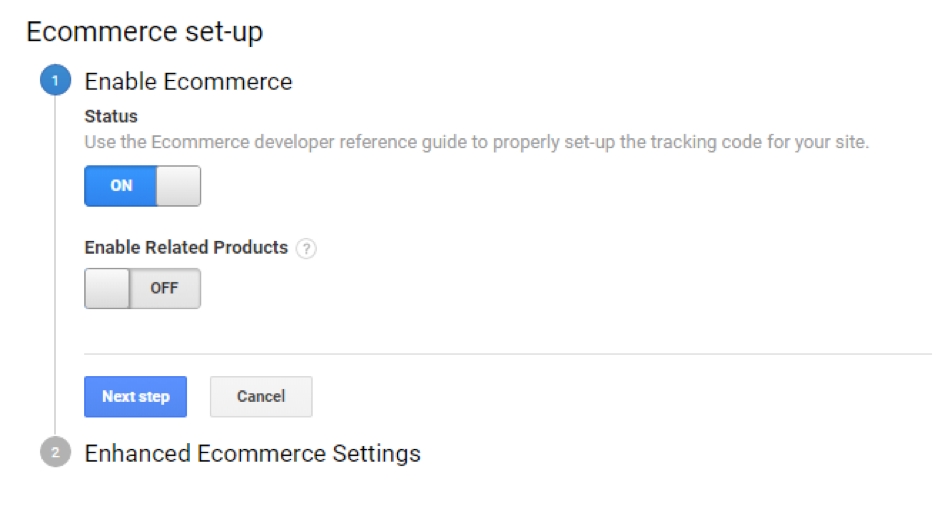
E-commerce Settings
Enable the "E-commerce" setting in the View Admin and leave “Related products” switched off.
In the next step, you can also enable Enhanced E-commerce features if you have this type of implementation.
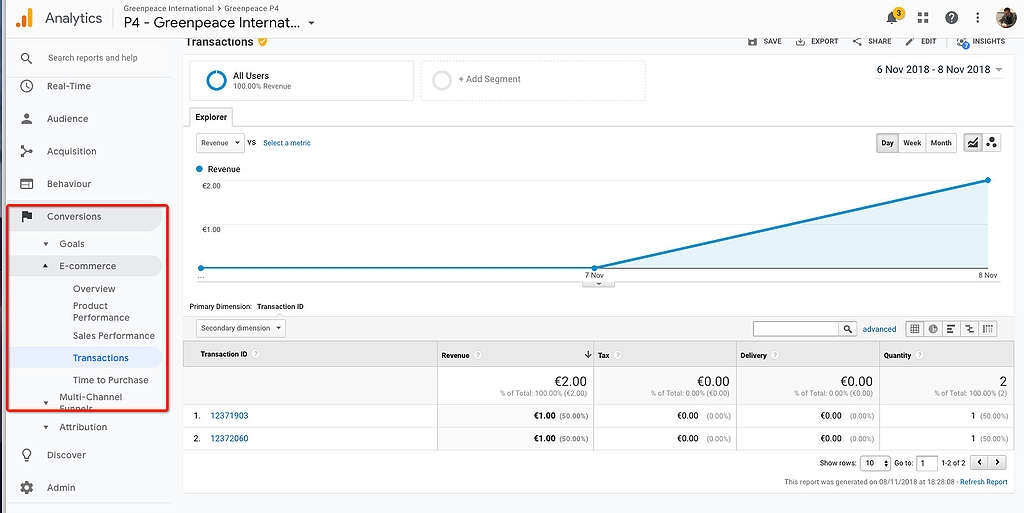
If the tracking implementation was done accurately, you will now be able to visualize donations in Conversions > E-Commerce > Transactions
Last updated